
1.0 Introduction
This tutorial is designed to help with making good star masks, in my opinion star masks are the most useful & most important mask in Pixinsight. Spending time getting a really good star mask will allow you to be much more agressive with processes like Deconvolution without introducing artifacts into your image like dark rings around bright stars. The first thing I suggest is to read the parameter description below and understand what each of the parameters do.
2.0 Parameters
Noise Threshold
Allows you to exclude noise or small structures. [Start at 0.1]
Scale
Allows you to select size of object to target.
[Try using 7-9 for normal images]
--------------------------------------------------------------------------------------------------------------------------------------
Large Scale
Grows large stars / structures.
[Start at 0]
{You can increase size of stars using Morphological Transformation - Dilate}
Small Scale
Grows small scale structures.
[Start at 0]
Compensation
Tied to small scale above.
[Start at 0]
--------------------------------------------------------------------------------------------------------------------------------------
Smoothness
Softens edges of mask.
[Try to stay within 12-20, normally 16]
Binarize
Makes mask being either full or nothing which hardens edges.
{You can use convolution later to soften edges}
Means small & large scale objects are equally weighted.
[I normally tick this option but untick if you want less steps and use large scale, small scale & compensation to adjust size. Normally you just need to use large scale.]
--------------------------------------------------------------------------------------------------------------------------------------
Shadows
Allows you to exclude background and dark features.
[Use readout mode over background at set to just above that value, don’t be afraid to go below this level if you want to futher include dim stars]
Mid-tones
Allows you to limit mid-tones.
[Try using really low values, sometimes below ‘Shadows’ value to include really faint stars]
Highlights
Allows you to limit highlights
[Use readout mode over really bright stars at set to around that value. If you have trouble finding a value to suit small and really large stars you can create two masks the add with Pixelmath]
3.0 Creating a Star Mask
The first step in creating a star mask is to extract a lightness from your image, unless you are using a monochrome image. You should then transfer an STF Auto-Stretch to this using Histogram Transformation. Create a preview that contains a variety of star sizes that you are interested in, drag this out to create a new view and open 'Process Menu > All Processes > StarMask'. I then start with the settings in the image below.
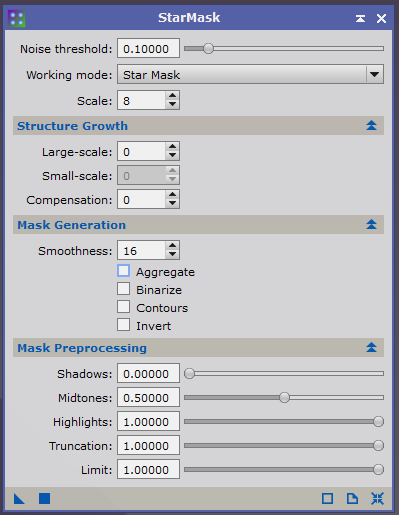
I firstly adjust the 'Mask Preprocessing' to get the mask targeting all the stars I am interested in. You can get an idea of what values are correct by using readout mode to see the values for dim, medium & bright stars, these would loosely correspond to shadows, midtones & highlights respectively.
If you are getting noise artifacts being included in your mask you should raise the 'Noise Threshold' value, you can judge this by zooming into an area of background with no stars and using readout mode to see what the values are.
If you are not getting the larger stars included in your mask you can increase the 'Scale' value.
I rarely use 'Structure Growth', I normally use 'Morphological Transformation - Dilate' to increase the star size followed by 'Convolution' to soften the mask edges.
Binarise is something I only really use as a last resort if I cannot get the mask to select all of the stars I want, this will definitely require the use of 'Convolution' to sfoten the edges.
4.0 Method for processing images containing area with nebulosity.
1. Create Preview(s) that cover areas of interest with different sized stars. Drag their name tab out to create a new image from them. This allows you to trial the mask settings quickly without processing the whole image.
2. Create good star mask, I typically spend most time adjusting shadows, mid-tones & highlights.
3. Create new mask by apply Pixelmath with equation as ‘0.5’, shown below, to your original luminance image. Rename this 'halfmask'.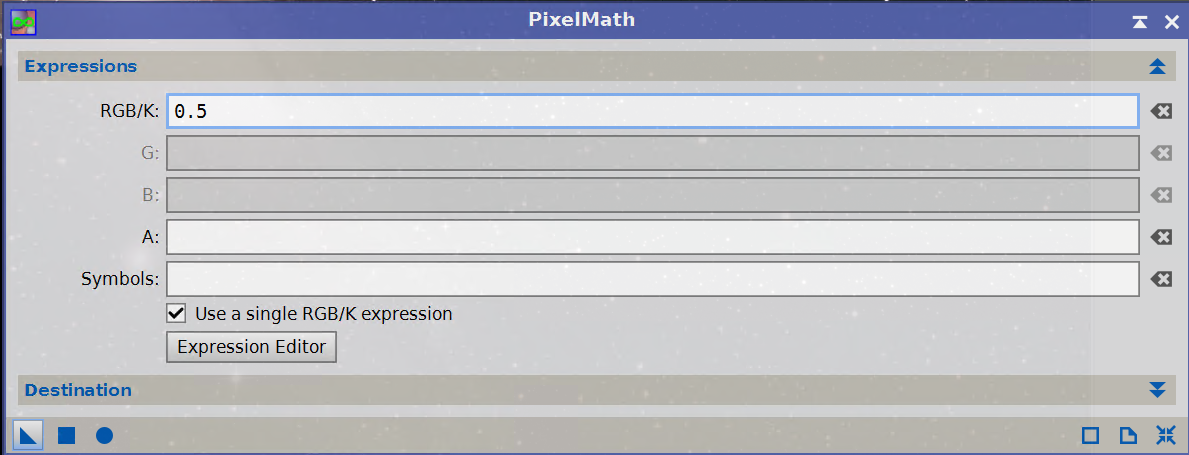
4. Subtract 'starmask' from 'halfmask' using PixelMath, as shown below.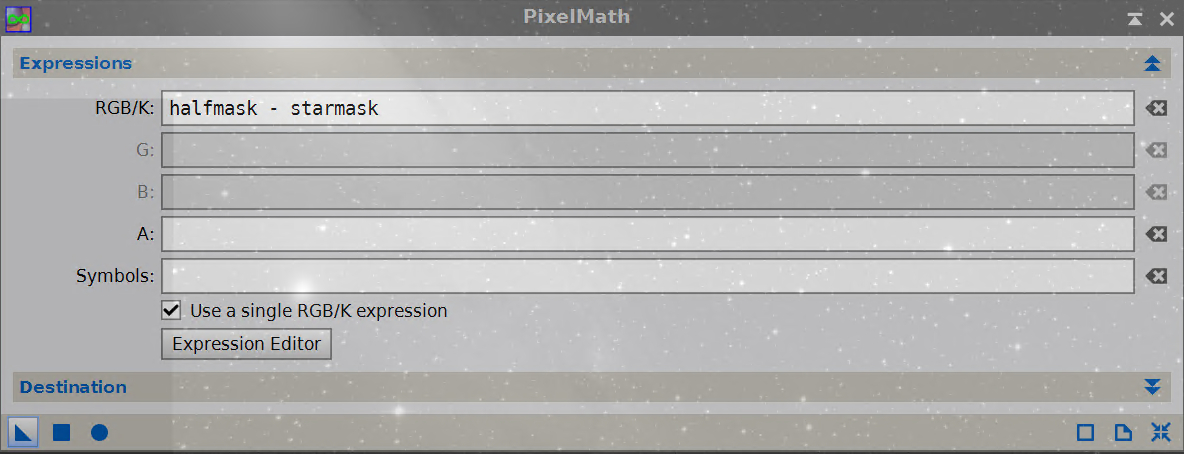
- This new mask lets you process the high signal nebulosity areas without affecting stars or background.
- Stops stars bloating.
- If you invert it you can process the star and background.