
In another article I mentioned that it is a good idea to calculate some of the electrical properties of your camera rather than using figures released online, even those from your camera manufacturer. The two properties I mentioned were:
- Read Noise
- Gain
After a couple of nights Googling how to imperically calculate these I discovered a mention of a script inside PixInsight that would use images taken by your camera to calculate this with almost no configuration required.
Stage 1
The first step, assuming you don’t already have them is to capture the following:
- 2x Bias
- 2x Dark
- 2x Light
It is recommended that the Darks be of different exposure lengths and ideally the longer exposure be 10x larger than the shorter. I chose to use 60 seconds & 600 seconds. For my camera I found that I needed to capture the files in RAW, ie. .NEF for my Nikon, to get PixInsight to open them in bayered monochrome.
Stage 2
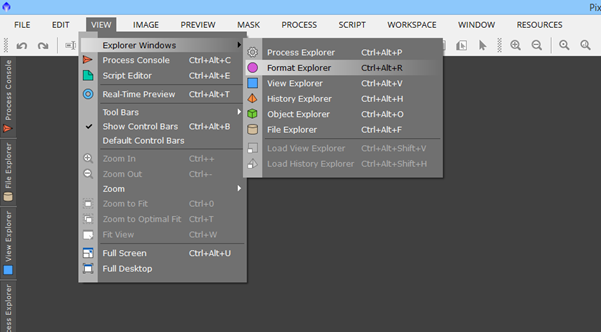
The next step applies to DSLR users only, if you are using a mono-CCD you can skip to Stage 3. PixInsight will, by default, debayer your raw images when it opens them. For this process we want PixInsight to open them in bayered monochrome form. This is a very simple process, let’s start by opening up PixInsight. Once open click ‘View’ > ‘Explorer Windows’ > ‘Format Explorer’. See image below.
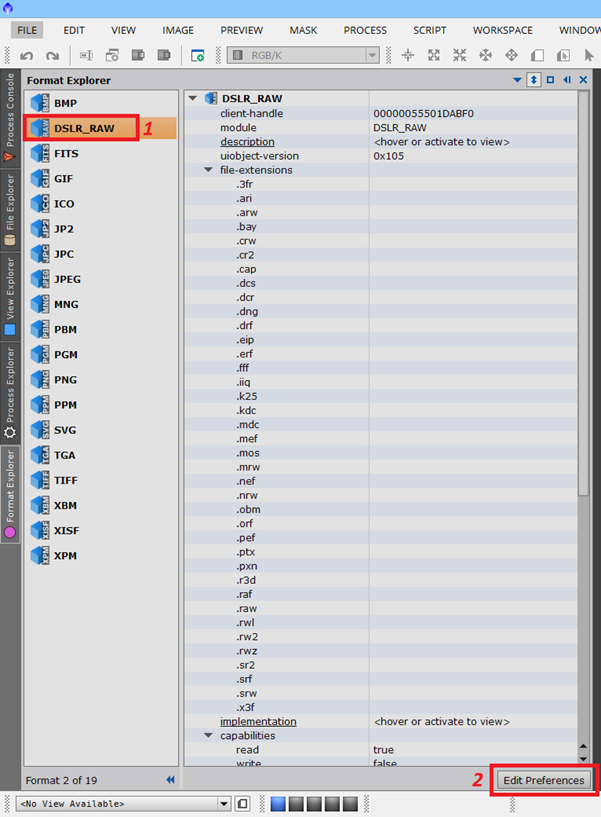
Now Select ‘DSLR_RAW’ & click the ‘Edit Preferences’ button at the bottom of the window.
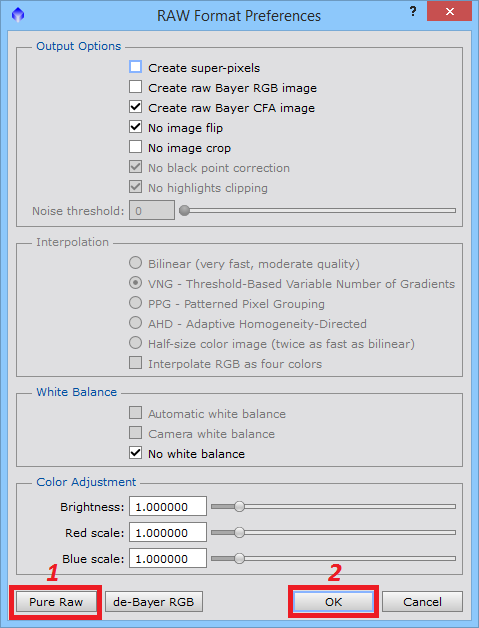
On the window that opens, click the ‘Pure Raw’ button, shown below. Then click ‘OK’ to close the window.
And that’s PixInsight configured, time to move on to Stage 3.
Stage 3
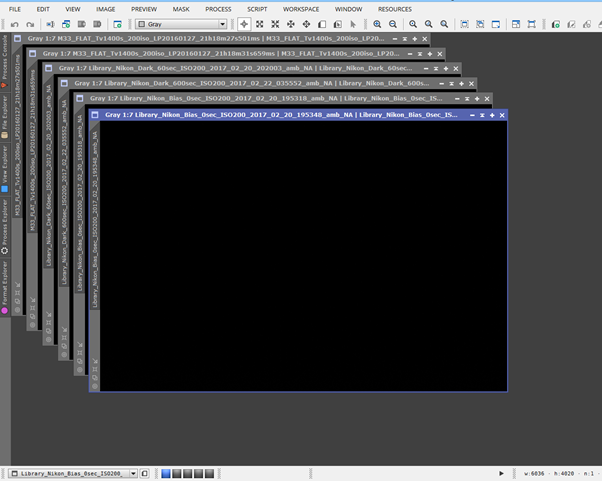
With PixInsight running, open all six of the images listed in Stage 1.
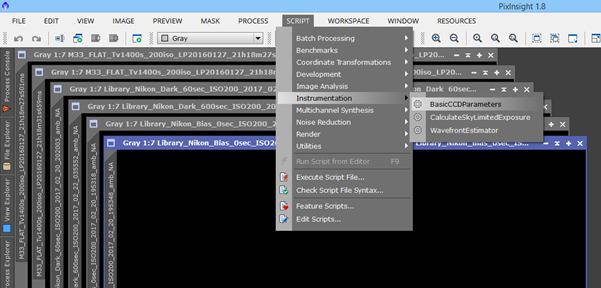
Now open the ‘BasicCCDParameters’ script. ‘Script’ > ‘Instrumentation’ > ‘BasicCCDParameters’.
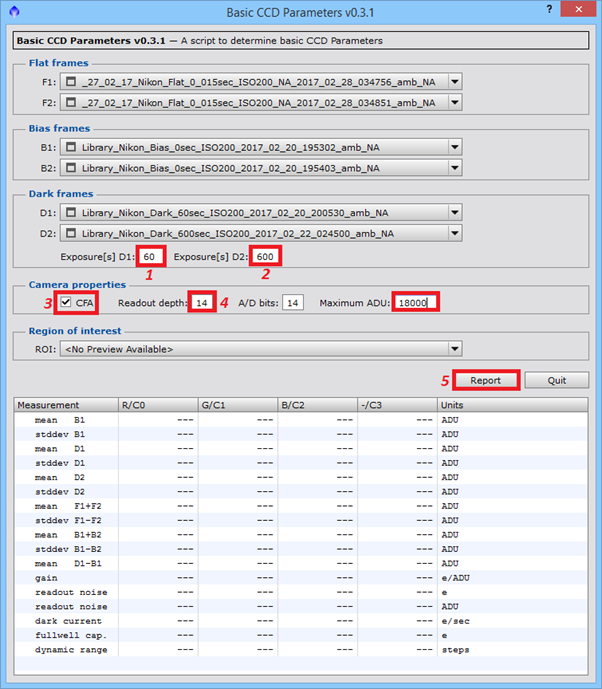
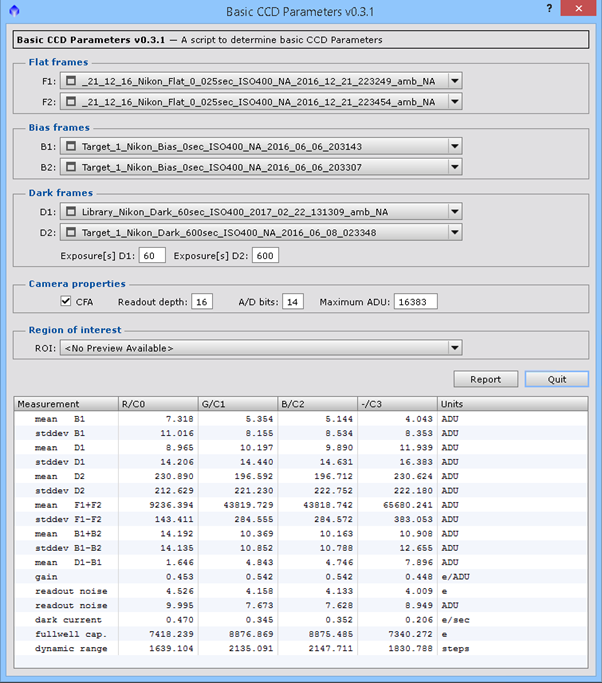
In the ‘BasicCCDParameters’ window first select your flat frames in the drop-down menus for F1 & F2. Next select your bias frames for B1 & B2. Finally select your dark frames for D1 & D2. For the Dark images you will need to manually input the exposure time in the boxes labelled 1 & 2 in the screenshot below. D1 & D2 correspond to the order in which you selected your images, take care not to input the exposure times in the wrong order.
Now we will complete the section titled ‘Camera Properties’, if you are using a monochrome CCD leave CFA unticked, if you are using a OSC (one shot colour) camera then you want to tick this option. OSC in this case is both CCD & DSLR.
Readout depth relates to the file that your camera capture program outputs, this is generally a 16 / 14 bit FIT or RAW file. The actual extension for a RAW file varies between camera manufacturers, Nikon use .NEF, Canon uses .CR2. I use SG Pro which outputs to 14bit FIT.
‘A/D bits’ refers to image capture depth your camera sensor uses. For modern CCD’s this is generally 16bit, for premium DSLR’s this can be 14bit, some DSLR’s will be 12bit. My Nikon d7100 can be set to use either 14bit or 12bit, I choose the former.
Maximum ADU is the point at which your sensor will saturate, I got this data from sensorgen.info, for my Nikon d7100 at ISO200 it was 18,000. Now that everything is setup, click the ‘Report’ button.
After a few seconds, depending on the speed of your computer, the table will populate with the calculated data for your sensor.
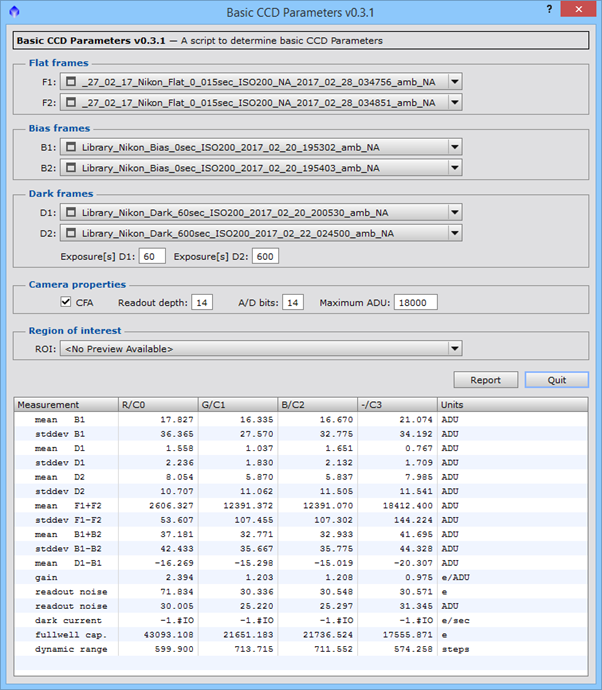
The table will list readout noise in ‘e’ and ‘ADU’, the former is what I use. The gain is listed in e/ADU which is also the units I require.
Now that you have the data you can use my previous article to calculate the ideal ADU range for your exposures. Below is the shortened calculation.
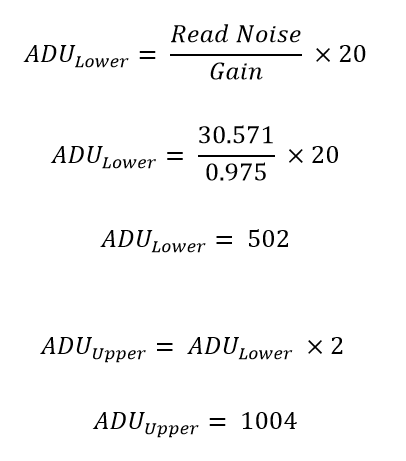
As per my previous article I would suggest rounding the Lower up to 600 and the higher up to 1200.
Results for Nikon d7100 ISO400
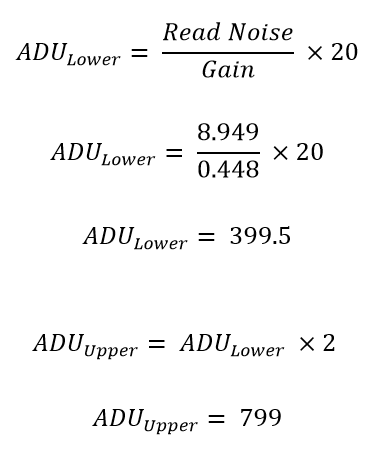
As per my previous article I would suggest rounding the Lower up to 500 and the higher up to 1000.