
PixInsight: Avoiding Star Bloat when Stretching
I have found that my images are very susceptible to star bloat, I think is mainly due to me having very fast (f/4) optics but also potentially due to a mis-matched coma corrector. Over the last few months I have been trying to find a method that would let me keep the bloat to a minimum. There are numerous tools that can be used in the workflow both pre and post stretching. Whilst these tools are quite effective I felt there should be some merit in trying to minimise the bloat as early in the workflow as possible. Some examples of how to reduce stars are:
- Deconvolution (While image is linear)
- Masked Stretch
- Morphological Transformation: Erosion
- Morphological Transformation: Morphological Selection
- Star Reduction Script
I do use Deconvolution as part of my processing and can confirm it is very effective a tightening the stars but I need a little more than it can offer by itself. My new stretching process is relatively simple & not time consuming, it follows the following process:
- Extract Lightness from ‘original’ image, or clone if it is a mono image, rename it as ‘lightness’.
- Use Histogram Transformation to apply an Auto-STF stretch to the ‘lightness’ image.
- Create a good starmask from the ‘lightness’ image, rename it as ‘starmask’.
- Apply ‘starmask’ to ‘original’ image, then invert the mask to protect everything except the stars.
- Apply a small Histogram Transformation stretch to ‘original’ image.
- Remove ‘starmask’ frim ‘original’ image.
- Use Histogram Transformation to stretch image to desired result.
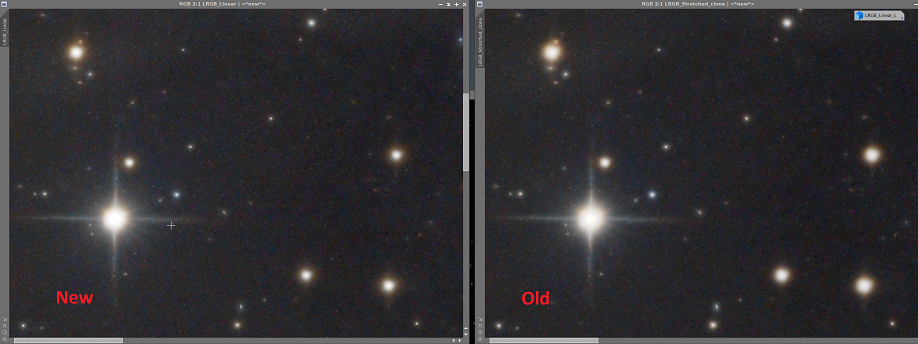
I have found that this works very well, as soon in the preview image below.
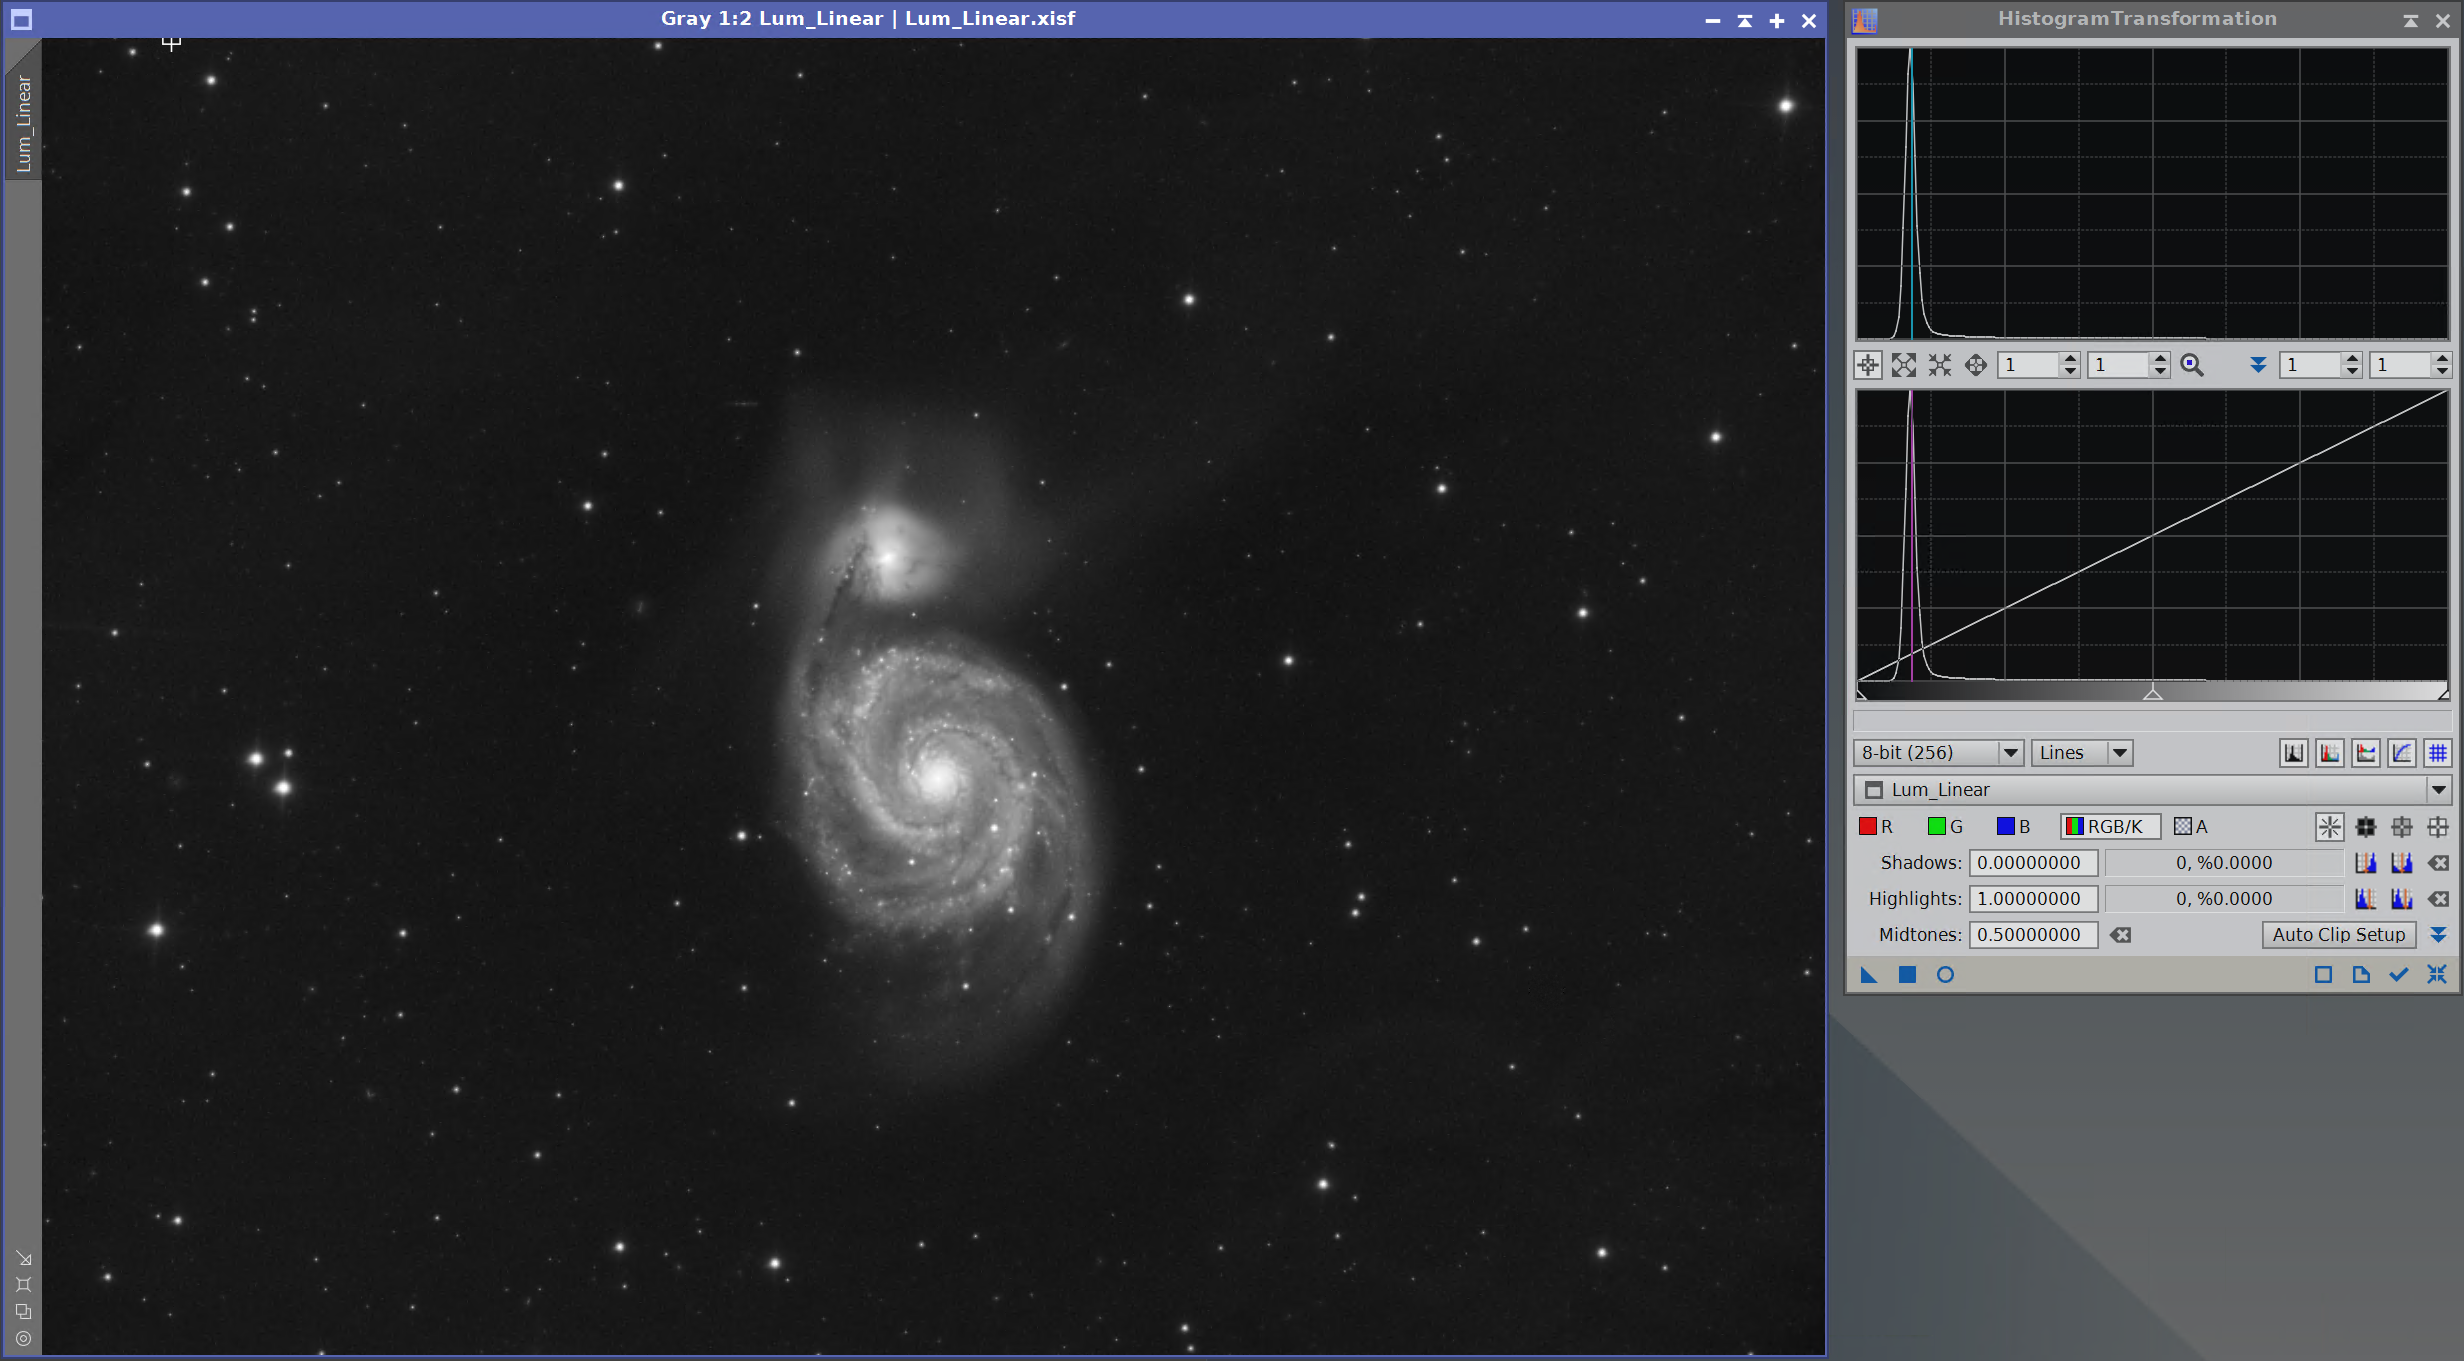
The following will be a worked example showing each step.I am starting with a Luminance image for Messier 51 – The Whirlpool Galaxy, it is a stack of almost 7 hours of 3min subs. It has been calibrated and stacked before being linear processed with:
- Dynamic Background Extraction – Gradient Removal.
- Deconvolution – Detail Recovery & Star Reduction.
- Multiscale Linear Transform – Noise Reduction.
Step 1
Clone Image. With image selected, ‘Edit’ Menu > ‘Duplicate’. Rename ‘lightness’.
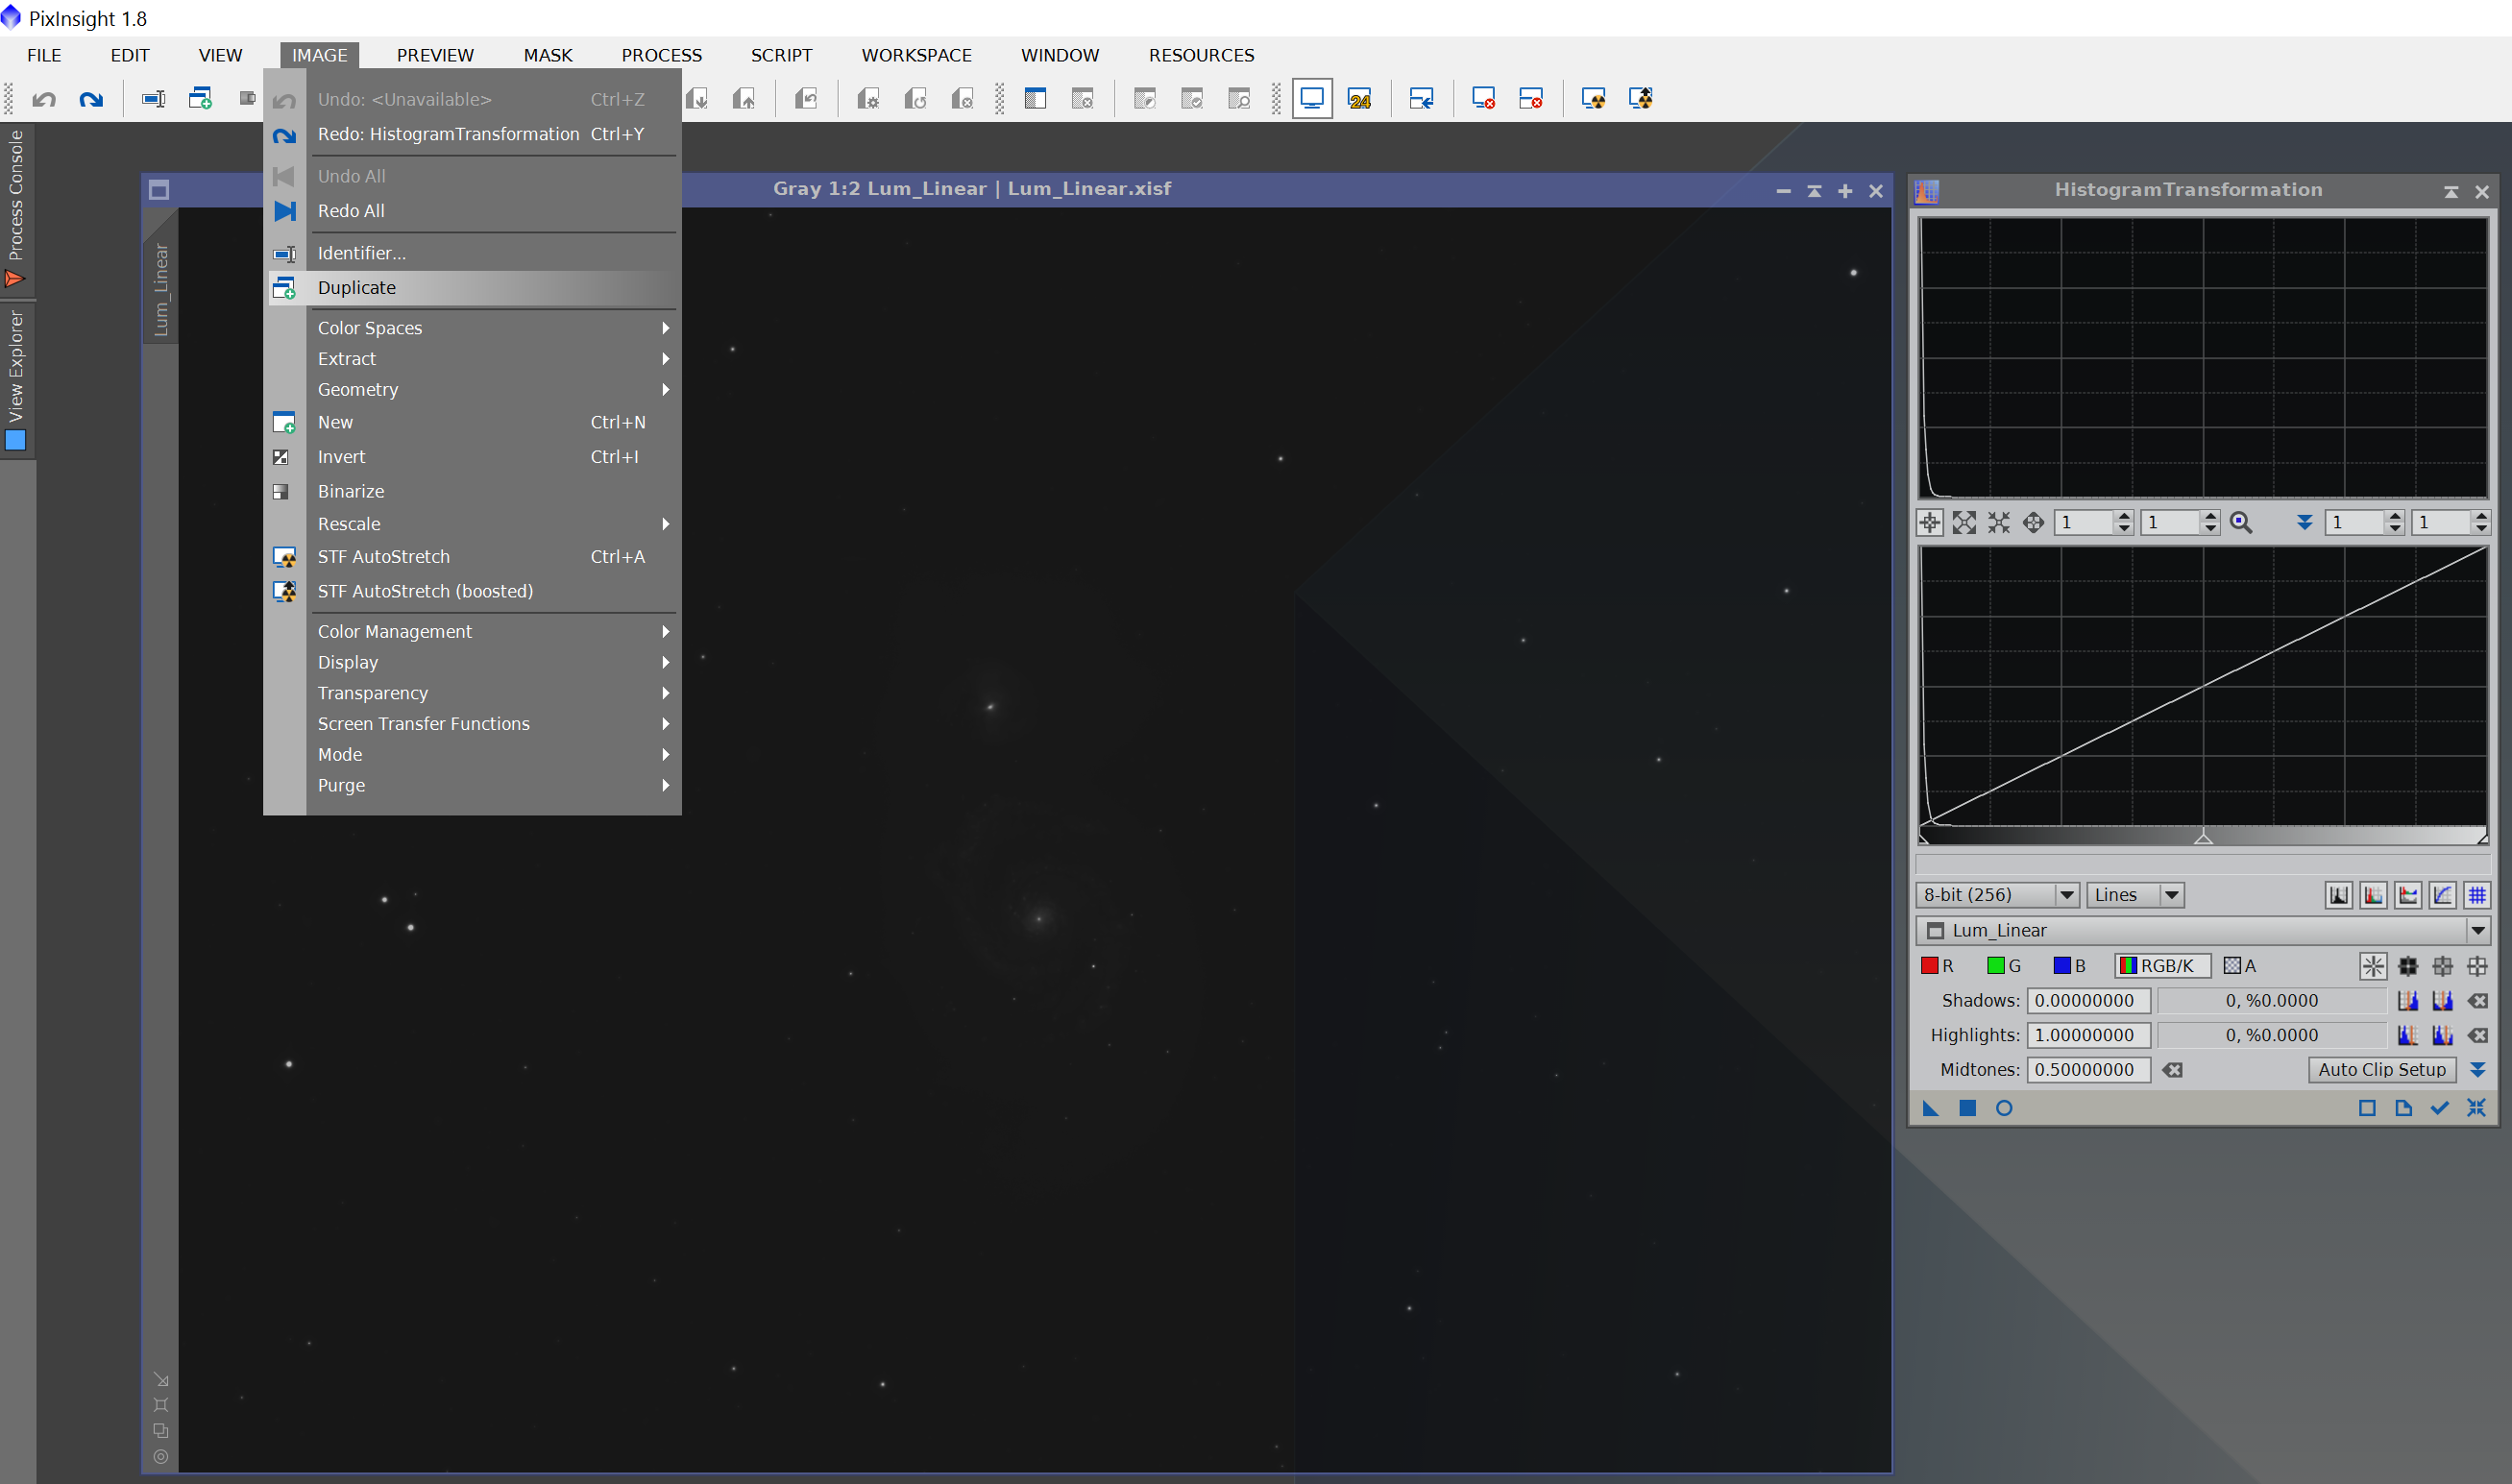
Step 2
Apply Auto-STF to ‘lightness’ using Histogram Transformation.
Step 3
Create a starmask that fits well, it needs to suit all stars in your original image. This can be challenging but I find the following settings generally work well for me.
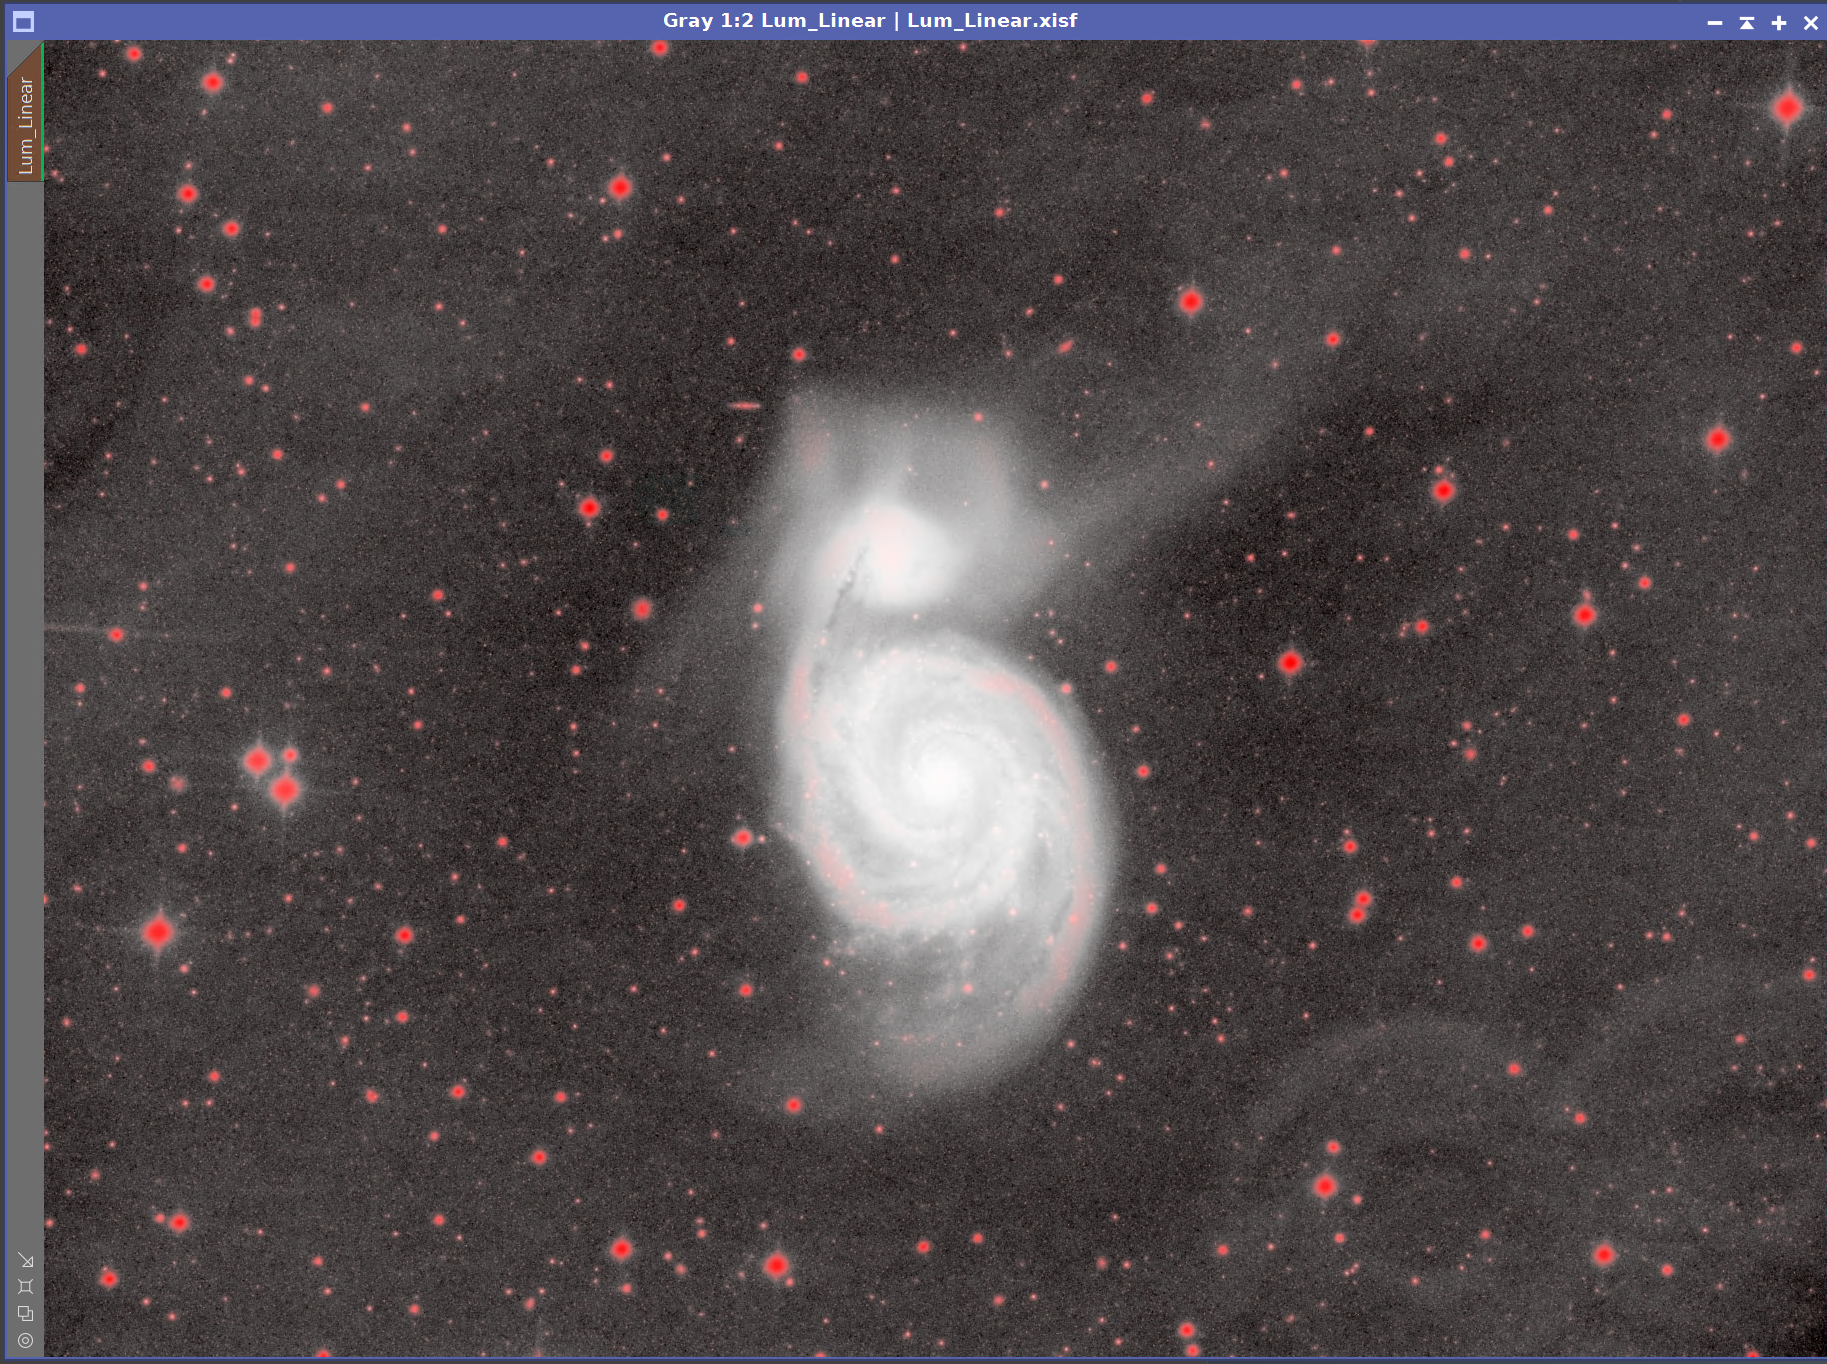
Step 4
Apply starmask to original image.
The image below shows the inverted starmask applied and the original image having a temporary Auto-STF stretch to show the fit around the stars.
Step 5
Hide starmask, either ‘Ctrl & K’ or ‘Mask’ menu > ‘Show Mask’
Step 6
Apply a stretch to the image using Histogram Transformation, just stretch enough that the mid-brightness stars or galaxy(s) are starting to show a bit. Like below, I have included the stretch settings (see middle slider position).
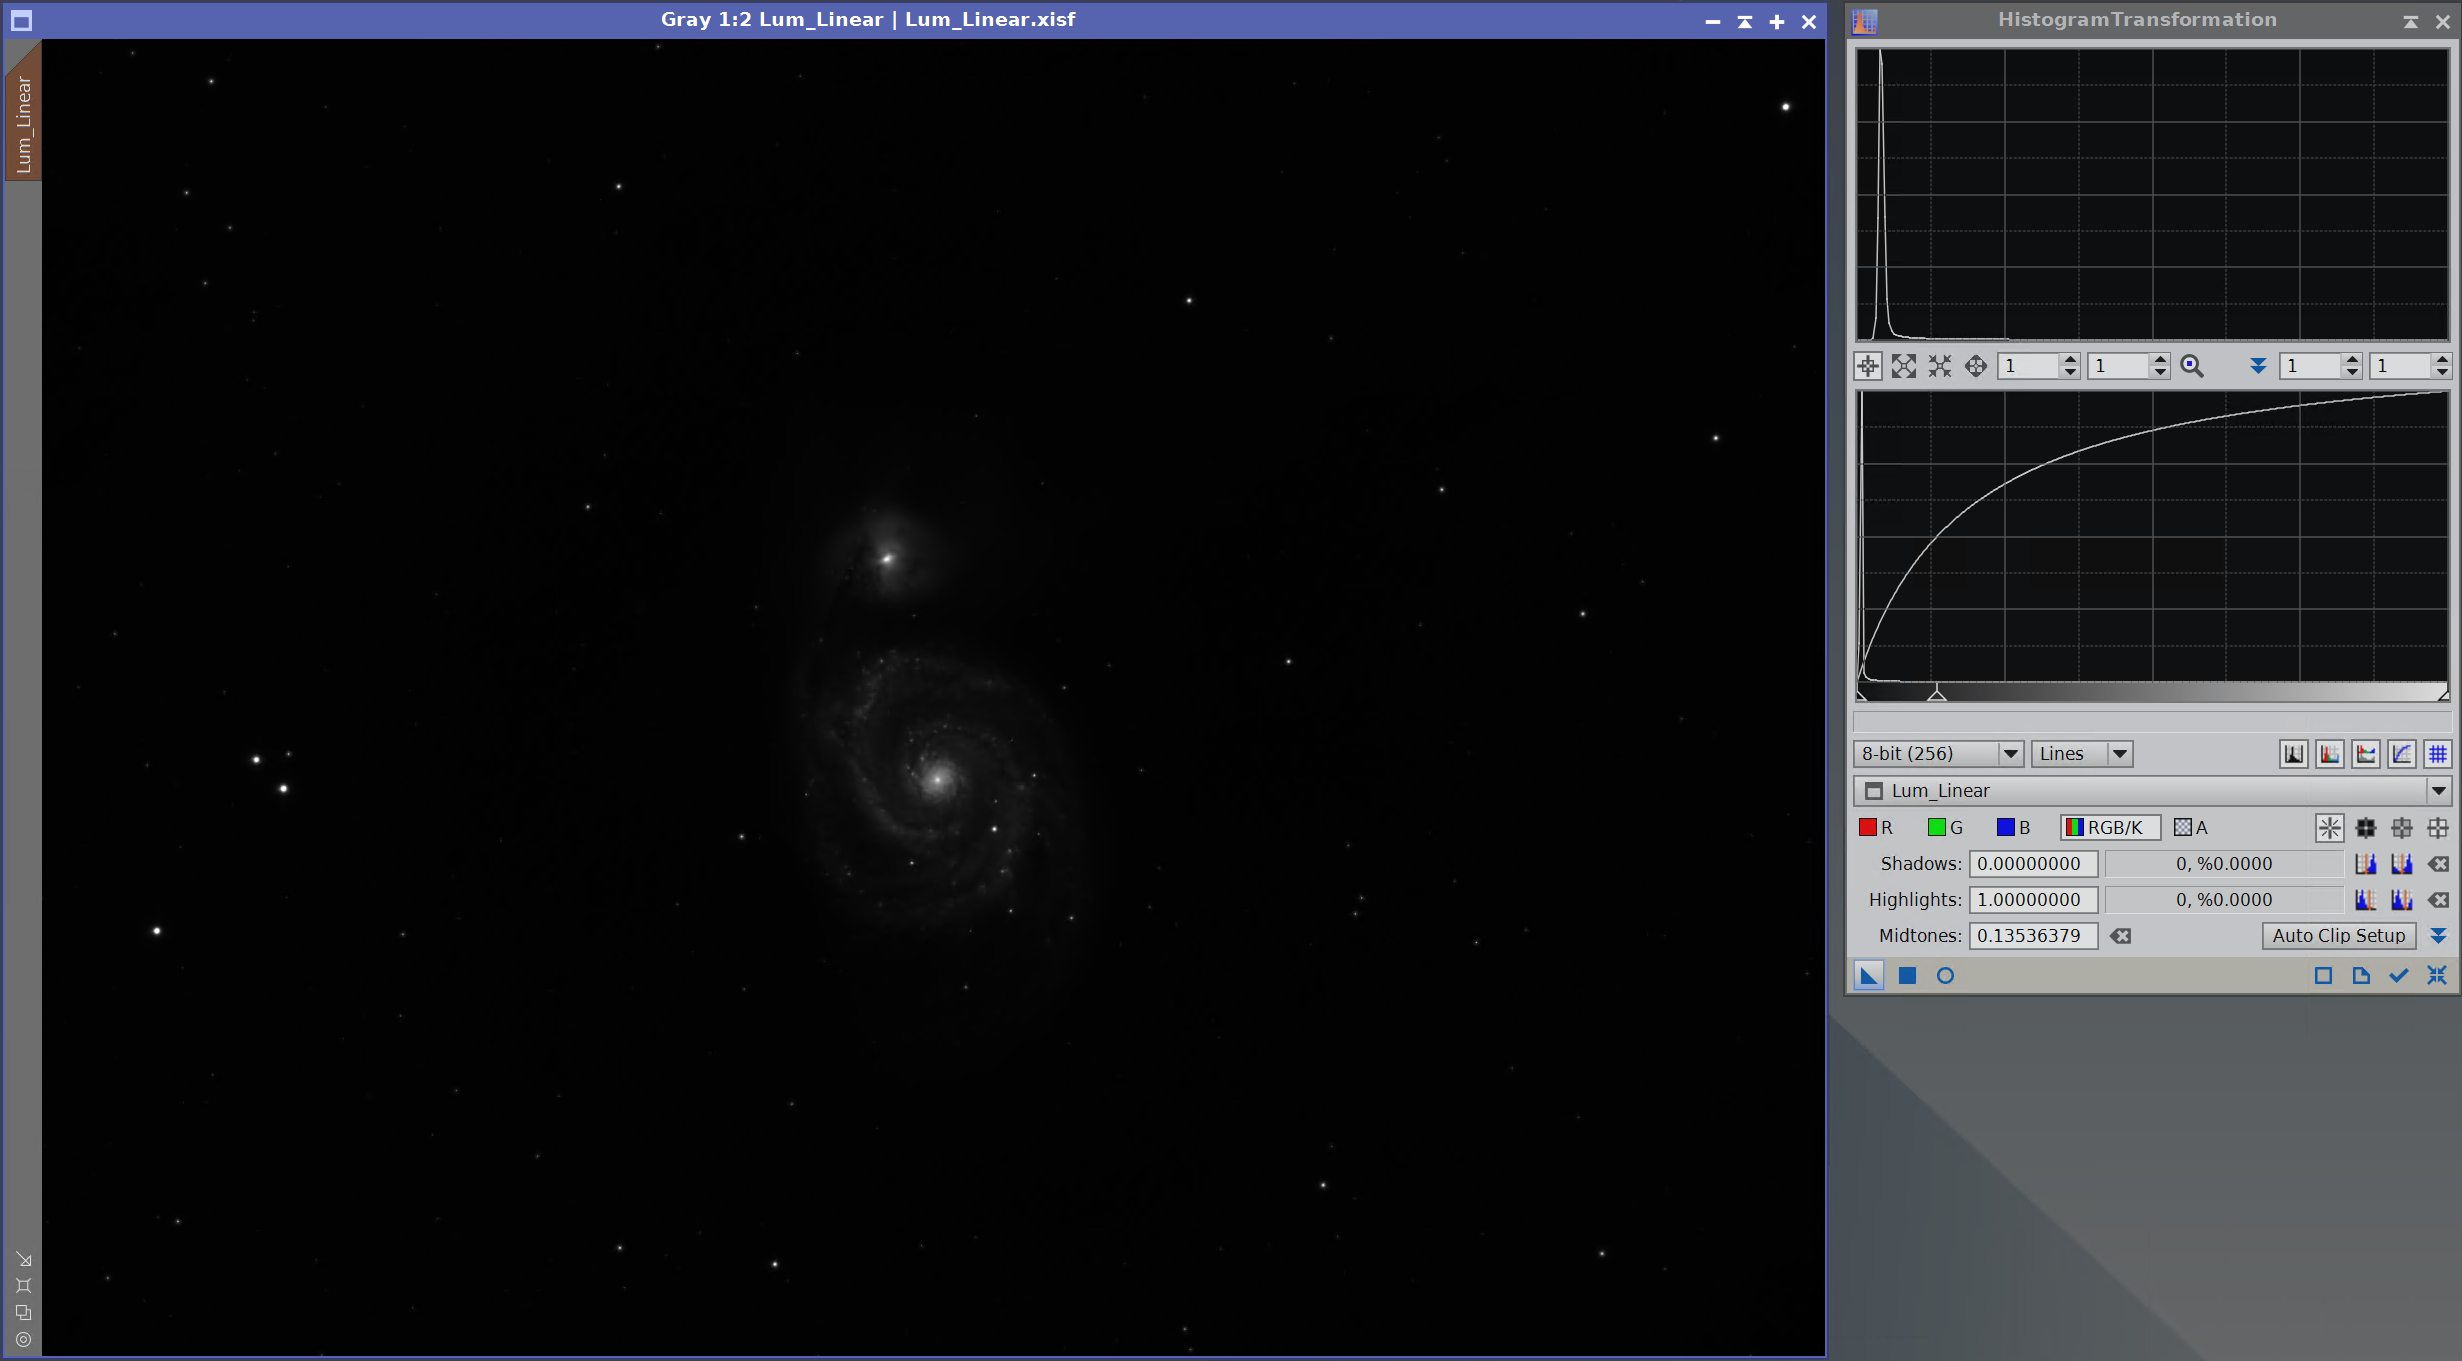
Please note if you push this stretch two far you will end up with dark rings around your stars.
Step 7
Remove starmask and continue to stretch the image as normal, using Histogram Transformation with real-time preview active.
Two additional iterations of different stretch amounts gave me an end result as shown below:
And that is basically it done, I would now move onto the non-linear portion of my workflow.